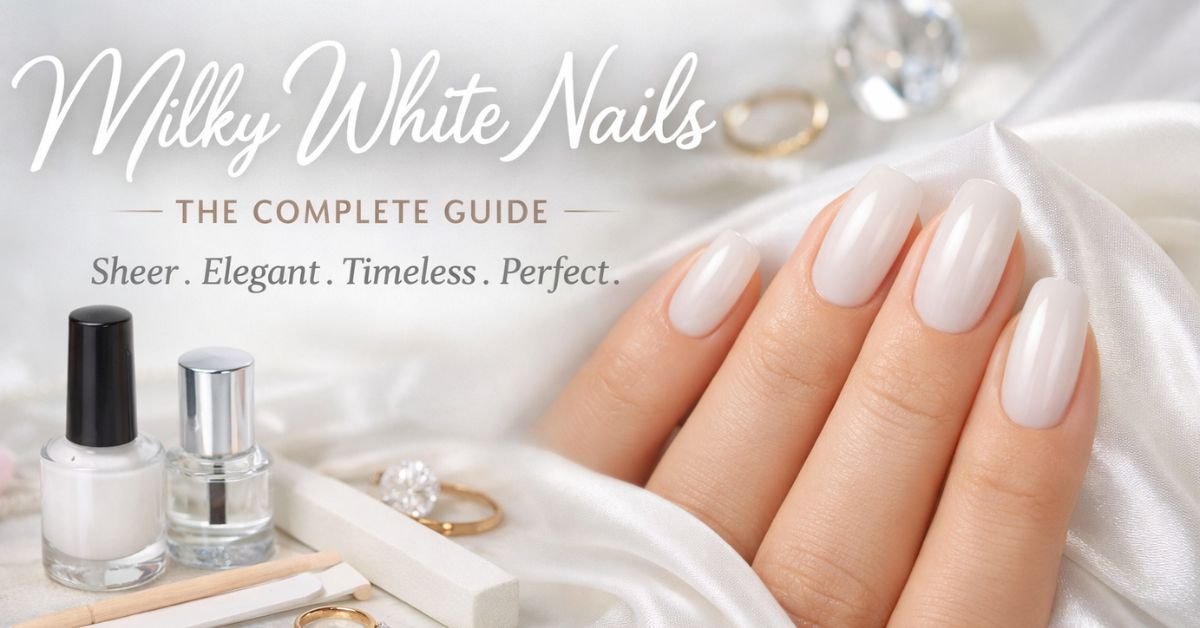
There’s something undeniably chic about milky white nails. This soft, translucent nail color has become a staple in modern manicures, offering a sophisticated alternative to stark white polish while maintaining that clean, polished aesthetic we all crave.
Whether you’re preparing for your wedding day, searching for the perfect everyday nail look, or simply want to understand what makes this trend so irresistible, you’ve come to the right place. I’ve spent years perfecting milky white manicures—both in professional salon settings and at home—and I’m here to share everything you need to know.
What Are Milky White Nails?
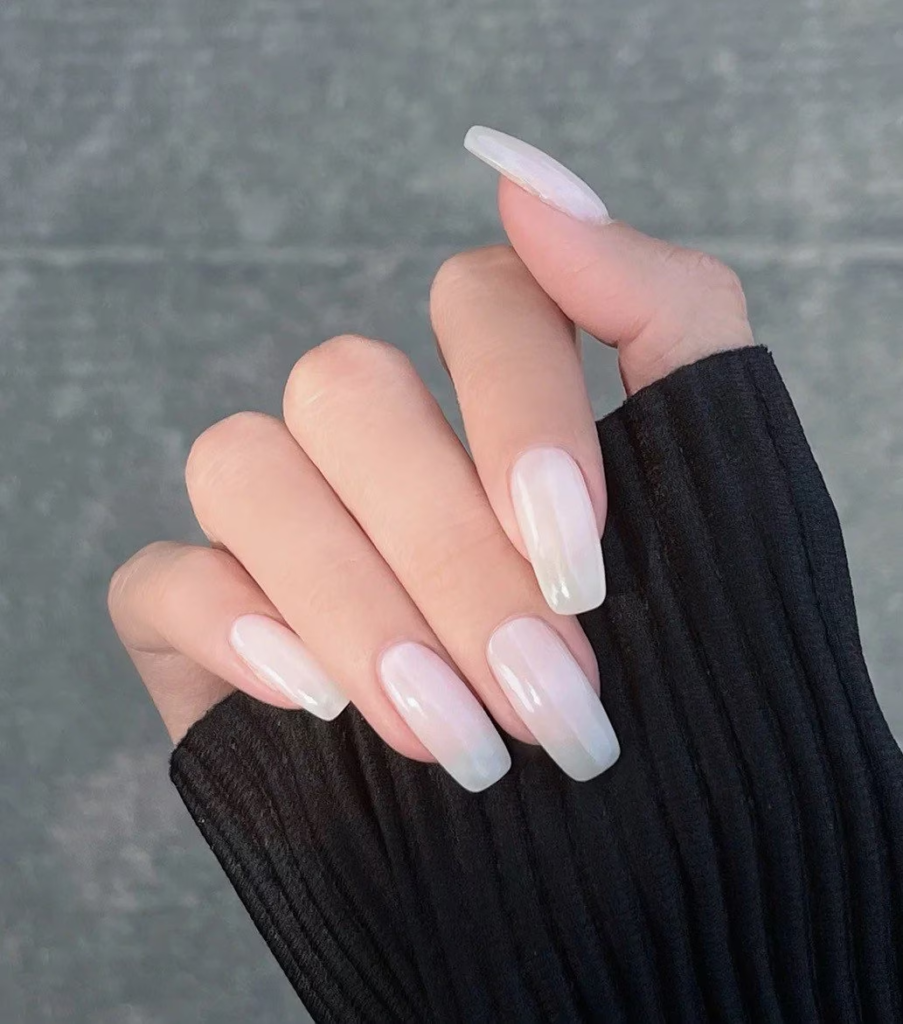
Milky white nails feature a sheer, cloudy white finish that allows your natural nail to subtly show through. Unlike opaque white polish that creates a stark, solid appearance, milky white nail color has a soft, buildable opacity that gives nails a naturally polished look.
Think of it as the “your nails but better” approach—they appear clean, elegant, and effortlessly put-together without looking overly done. This versatility is exactly why milky white nails have remained popular year after year, transcending seasonal trends to become a true classic.
How to Get Milky White nails: Step-by-Step Tutorial
How to Do Milky White Nails at Home
Achieving professional-looking milky white nails doesn’t require a salon visit. Here’s exactly how to get milky white nails in your own home:
What You’ll Need:
- Nail file and buffer
- Cuticle pusher and oil
- Base coat
- Sheer milky white nail polish (2-3 thin coats work best)
- Top coat
- Nail polish remover and cleanup brush
Step-by-Step Process:
Start with clean, dry nails. Remove any old polish completely and wash your hands thoroughly. Push back your cuticles gently—this creates a clean canvas and makes your manicure look more professional.
Shape your nails to your preferred style. Milky white works beautifully on any shape, so choose what flatters your fingers most. File in one direction to prevent splitting.
Apply a thin base coat and let it dry completely. This protects your natural nails and helps the polish adhere better.
Here’s where technique matters: apply your first coat of milky white nail polish in thin, even strokes. Don’t worry if it looks very sheer—that’s expected. The key to how to make milky white nail polish look its best is building up thin layers rather than applying one thick coat.
Wait two minutes, then apply your second coat. Depending on the opacity you want and the specific polish formula, you may need a third coat. I usually find two coats gives that perfect semi-sheer look, while three coats provides more coverage if you prefer.
Finish with a glossy top coat to seal everything and add shine. This also extends the life of your manicure significantly.
Clean up any polish on your skin using a small brush dipped in nail polish remover. This final touch makes the difference between a home manicure and a salon-quality result.
The Best Milky White Nail Polish: Product Recommendations
Sheer Milky White Nail Polish Options
Not all milky white polishes are created equal. The formula you choose dramatically affects your final look. Here are the characteristics that make for excellent sheer milky white nail polish:
Opacity Level: Look for descriptions like “sheer,” “jelly,” or “semi-transparent.” These formulas build beautifully without becoming chalky or streaky.
Consistency: The polish should flow smoothly without being too thick or watery. Medium viscosity works best for even application.
Finish: Most milky white polishes have a natural shine, but some offer matte or pearl finishes for variation.
OPI Milky White Nail Polish and Other Brand Favorites
OPI offers several excellent options in the milky white family. Their “Funny Bunny” is a cult classic—a soft, buildable white that’s been a favorite for decades. “Alpine Snow” provides slightly more coverage while maintaining that desirable milky quality.
Other brands worth exploring include Essie’s “Marshmallow” for a budget-friendly option, Olive & June’s “CC” for a modern jelly formula, and Orly’s “Kiss Me, I’m Kind” for those who prefer organic formulas.
Milky White Gel Nail Polish
If you’re working with gel, the game changes slightly. Milky white gel nail polish typically requires a UV or LED lamp for curing, but the payoff is worth it—you’ll get two to three weeks of chip-free wear.
Popular milky white gel nails formulas include options from Beetles, Modelones, and Gellen. The application process mirrors regular gel manicures: prep, base coat, two thin coats of color (curing between each), and top coat.
The advantage of milky white gel nails is the durability and the way gel polish self-levels, creating an incredibly smooth finish that’s difficult to achieve with regular polish.
Milky White Nails by Shape: Finding Your Perfect Match
The beauty of milky white nail color is its versatility across nail shapes. Let me walk you through how this shade looks on different shapes so you can choose what works best for you.
Milky White Square Nails
Square nails with milky white polish create a modern, fashion-forward look. The straight-across tips paired with the soft white hue balance edginess with elegance. Milky white square nails work particularly well on longer nail beds and are my go-to for a clean, professional appearance.
To achieve the perfect square shape, file straight across the tip, then gently round the sharp corners to prevent snagging.
Milky White Coffin Nails
Coffin nails (also called ballerina nails) feature a tapered shape with a squared-off tip. Milky white coffin nails are incredibly popular on Instagram and Pinterest for good reason—they’re glamorous yet wearable.
This shape requires more length, so if your natural nails are short, you’ll likely need extensions. The milky white color softens the dramatic coffin shape, making it less severe than when paired with darker colors.
Milky White Almond Nails
If you want to elongate your fingers, milky white almond nails are your answer. The almond shape is universally flattering, and when paired with milky white polish, it creates an elegant, feminine look that’s appropriate for any occasion.
This shape works beautifully on both natural nails and extensions, and the soft white shade highlights the graceful taper of almond-shaped nails.
Stunning Milky White Nail Designs
While milky white nails are gorgeous on their own, adding designs takes them to the next level. Here are the most popular milky white nail designs I see requested in salons and trending online.
Classic Milky White French Nails
The combination of milky white base with white tips creates a modern twist on the traditional French manicure. Milky white french nails offer more depth and interest than the classic nude base, while maintaining that timeless, polished aesthetic.
For a contemporary take, try milky white nails with white tips that are thicker than traditional French tips, or experiment with different tip shapes—rounded, squared, or even chevron.
Baddie Milky White Nails with Design
The “baddie” aesthetic brings bold elements to soft milky white bases. Popular baddie milky white nails with design include:
- Thin black line art or geometric patterns
- Gold or silver foil accents
- Rhinestone or crystal embellishments
- Mix-and-match designs where each nail features different art
- Negative space designs that show off the milky base
These designs work especially well on coffin or long square shapes and create that perfect balance between soft and statement-making.
Milky White Marble Nails
Marble effects pair beautifully with milky white bases. Milky white marble nails typically feature soft gray, gold, or even pink veining that creates an organic, luxurious look. You can achieve this effect with:
- Water marbling technique
- Alcohol ink drops
- Thin brush painting
- Marble nail stickers or decals
The translucent quality of milky white polish adds depth to marble designs, making them appear more realistic than when done on opaque bases.
Milky White Chrome Nails
For something futuristic and eye-catching, milky white chrome nails deliver serious impact. The chrome powder or polish applied over a milky white base creates an iridescent, mirror-like finish that shifts in different lighting.
This look typically requires gel polish as a base, with chrome powder rubbed onto the tacky layer before sealing with a no-wipe top coat.
Milky White Cat Eye Nails
Cat eye nails use magnetic gel polish to create a striking light reflection effect. Milky white cat eye nails combine the soft, sheer base color with that mesmerizing magnetic shimmer line that appears to move across the nail.
This technique requires special cat eye gel polish and a magnet, but the results are absolutely worth the investment for something truly unique.
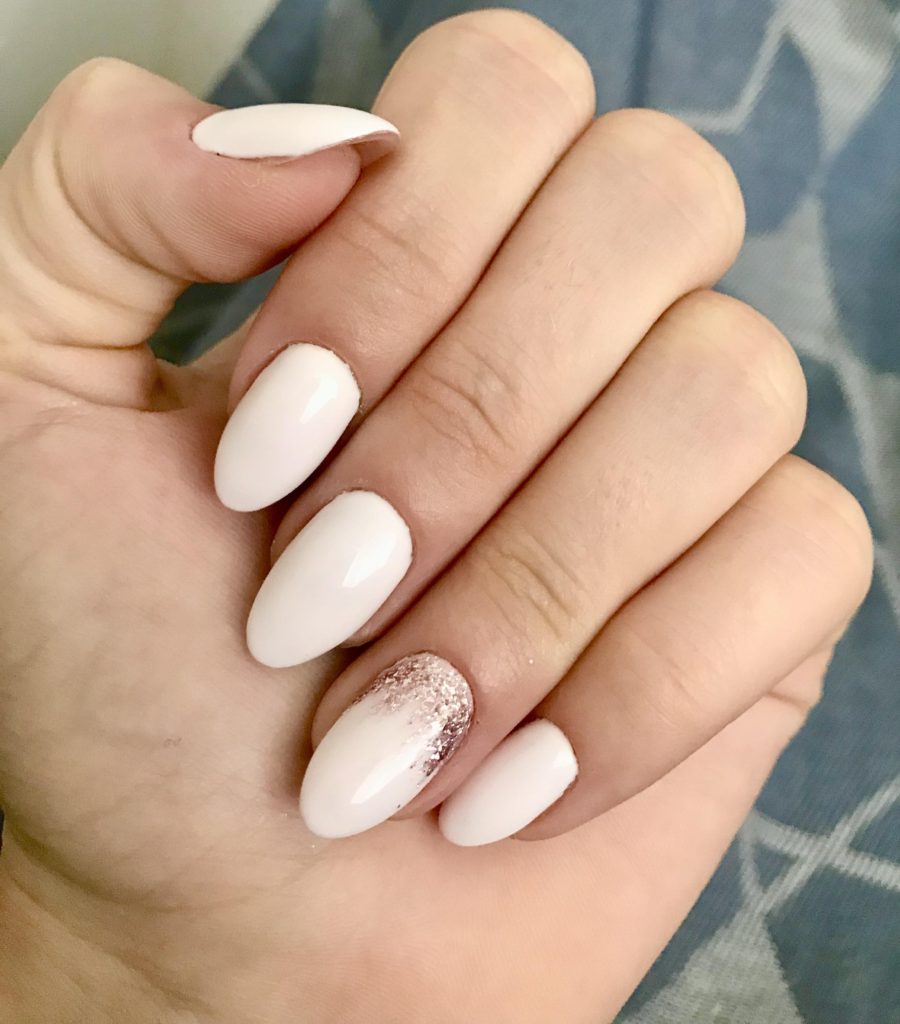
Milky White Nails with Glitter
Adding sparkle to milky white nails creates dimension without overwhelming the soft base color. Options include:
- Full glitter accent nails
- Glitter gradients starting at the tips or cuticles
- Scattered glitter that looks like stars on a milky sky
- Glitter French tips for extra glam
- Fine holographic glitter for subtle shimmer
The sheer nature of milky white polish allows glitter to shine through beautifully, creating depth that doesn’t happen with opaque colors.
Milky White Acrylic Nails vs. Gel: Which Should You Choose?
When deciding between milky white acrylic nails and gel options, consider your lifestyle and what you’re hoping to achieve.
Milky White Acrylic Nails:
- Best for significant length or dramatic shapes
- Incredibly durable and strong
- Last 3-4 weeks with proper maintenance
- Require professional removal
- Can be sculpted or applied with tips
- Cost: typically $35-$80 depending on location
Milky White Gel Nails:
- Work on natural nails or short extensions
- Lighter and more flexible than acrylic
- Last 2-3 weeks typically
- Easier on natural nails
- Can be done at home with a lamp
- Cost: $30-$60 in salons, $50-$100 for home setup
Both options can achieve that perfect milky white finish. Your choice should depend on whether you need added length (acrylic) or prefer to enhance your natural nails (gel).
Pro Tips for Long-Lasting Milky White Manicures
After years of wearing milky white nails in various forms, here’s what actually works to make them last:
Prep is everything. Properly pushing back cuticles, buffing the nail surface lightly, and ensuring completely dry nails before polish application makes the difference between a manicure that lasts three days versus three weeks.
Thin layers win. Thick coats of milky white polish might seem faster, but they bubble, peel, and chip more easily. Two to three thin coats always outperform one thick application.
Cap the free edge. When applying each coat—base, color, and top—run the brush along the tip of your nail. This seals the edge and prevents tip wear.
Moisturize constantly. Cuticle oil is your best friend. Apply it daily, paying special attention to the skin around your nails. This prevents lifting and keeps your manicure looking fresh.
Avoid hot water for the first few hours. After applying polish (especially regular polish), keep your hands out of hot water for at least 3-4 hours to allow complete drying.
Why Milky White Nails Work for Every Occasion
The true genius of milky white nail color is its incredible versatility. Here’s why this shade works everywhere:
For work: It’s professional and polished without being boring. Milky white nails look put-together in conservative office environments while still showing personality.
For weddings: Brides and bridesmaids alike love milky white nails because they complement any dress color and photograph beautifully. The soft white doesn’t distract from the dress or jewelry.
For everyday: They’re low-maintenance when it comes to showing chips or imperfections. Small wear spots blend into the sheer finish rather than standing out like they would with bold colors.
For special events: Milky white provides the perfect canvas for added designs, jewels, or art when you want something extra special.
Common Mistakes to Avoid
Even experienced nail enthusiasts make these errors with milky white polish:
Mistake 1: Applying thick coats. The temptation to get coverage in one go leads to streaky, uneven results. Patience with multiple thin coats creates the beautiful, buildable finish this color is known for.
Mistake 2: Skipping base coat. Some people skip base coat thinking milky white won’t stain, but base coat provides adhesion and smooth application surface that makes color coats look better.
Mistake 3: Using old or thick polish. Milky white formulas can thicken over time, becoming goopy and difficult to apply smoothly. If your polish is over a year old or has become thick, it’s time to replace it or thin it with a couple drops of nail polish thinner.
Mistake 4: Not considering undertones. Some milky whites lean slightly pink, others slightly blue or yellow. Test on one nail first to ensure the undertone complements your skin tone.
The Final Polish
Milky white nails represent the sweet spot between natural and polished, simple and sophisticated. Whether you opt for classic milky white french nails, experiment with milky white marble nails, or keep it beautifully simple with a sheer milky white nail polish application, you’re choosing a look that’s stood the test of time.
The key to perfect milky white nails—whether you choose milky white acrylic nails, milky white gel nails, or traditional polish—is quality products and patient application. Take your time building those sheer layers, maintain your manicure with cuticle oil and gentle care, and you’ll understand why this nail trend has captivated everyone from minimalists to nail art enthusiasts.
Ready to try this look? Start with a good quality sheer milky white nail polish, follow the application steps I’ve outlined, and enjoy your effortlessly elegant manicure. Your nails will thank you.
FAQS About Milky White Nails
Q1. What is the difference between milky white nails and white nails?
Milky white nails have a sheer, translucent finish that allows the natural nail to show through slightly, while white nails are fully opaque and appear bright and solid.
Q2. How many coats are needed for milky white nails?
Most milky white nail polishes require 2–3 thin coats to achieve the perfect semi-sheer look without streaks.
Q3. Are milky white nails suitable for short nails?
Yes, milky white nails look elegant on both short and long nails. The sheer finish can make short nails appear cleaner and more elongated.
Q4. Do milky white nails work for all skin tones?
Yes. Milky white nails are universally flattering, but choosing a formula with the right undertone (pink, neutral, or soft ivory) enhances the look for different skin tones.
Q5. Are milky white nails good for weddings?
Absolutely. Milky white nails are one of the most popular wedding manicure choices because they photograph beautifully and complement any bridal style.
Q6. Do milky white nails chip easily?
When applied in thin layers with proper prep and sealed with a top coat, milky white nails are just as durable as other neutral shades.
Q7. Can you do milky white nails with gel polish?
Yes. Milky white gel polish is very popular because it offers a smoother finish and lasts up to 2–3 weeks without chipping.
Q8. Are milky white nails considered professional?
Yes. Their clean, natural appearance makes them ideal for professional and office environments.
CLICK HERE FOR MORE INFORMATIVE BLOG POSTS
Jesse Zanger is the managing editor of aldalive.com and is based in New York City. He earned a degree in Philosophy from Hamilton College in 1998. Jesse has spent his entire professional career in New York, reporting on both local and national news for MacNeil/Lehrer Productions, Spectrum News NY1, Fox News, and 5ebackgrounds.com. During his time at local News Channel, he was part of the team that helped introduce the on-screen news crawl shortly after 9/11. As a member of the leadership team at 5ebackgrounds.com, the site has received notable industry honors, including a New York State Broadcasters Association Award (2019) and a Regional Edward R. Murrow Award (2017).